Brad's 1954 R Series Build


The place to put your L, R and S "Build Off" story.

Golden Jubilee
Golden Jubilee

Posts: 8948

Joined: Thu Dec 27, 2012 12:45 pm

Location: Canada's left Coast

Post Tue Jan 27, 2015 9:01 pm

Re: Brad's 1954 R Series Build

I always use an epoxy etching primer on the bare metal before applying any filler. PPG DP 40 was my favorite when I was still doing this kind of work. I send it out because my lungs cannot handle the dust, now. Be careful
I would rather have tools I do not need than to need tools I do not have
Artificial intelligence is no match for real stupidity....
User avatar

Golden Jubilee
Golden Jubilee

Posts: 343

Joined: Tue Jul 15, 2014 11:57 pm

Location: Plano, TX

Post Wed Jan 28, 2015 9:48 am

Re: Brad's 1954 R Series Build

thanks! over Christmas when all the deals were going on, i purchased eastwood fast etch to knock out the rest of the surface rust, pre paint prep, and epoxy primer. A buddy of mine used it on a bronco he redid and was pleased enough with the products that i figured it would work for me too.

My plan is to get the metal work done on cab here over the next couple months (other two cab corners, minor toe board repair, and firewall smoothing). Strip the rest of the paint off the cab and get it into epoxy. Ideally, i take it somewhere to get blasted, but i just dont think thats in the cards for me. I will do the best than i can with my grinder and a small blast gun.

Then i suppose i will work on the fenders, then the grill, and the doors

The fenders are pretty darn good overall. However, i know that i have issues on one of them where the previous body man just braised in a piece of metal where the fender blinker hole once was and then caked it with plastic. I know i will be putting some new metal in to fix that.

On the grill, its not terrible either overall, but the driver side blinker area shows some serious shoddy work that i know i will be fixing too. I am thinking about filling in the blinker holes under the headlights. I saw someone else use the headlights that incorporate blinkers in them....and i thought it looked good. So i plan to go that route.

the doors appear in very good shape. No visible signs of corrosion or former body work. I have all new window tracks and felt. Although, it makes me nervous to take all the internal window stuff out without directions to get it all back in :).
User avatar

Golden Jubilee
Golden Jubilee

Posts: 343

Joined: Tue Jul 15, 2014 11:57 pm

Location: Plano, TX

Post Wed Jan 28, 2015 9:50 am

Re: Brad's 1954 R Series Build

So, the truck only has a door lock on the passenger door. From what i have read, this is normal?

Since i don't have a key for it, i am thinking about just removing it though and smoothing it. Just looking at it though, i have no idea how to get it removed. I am sure i will figure it out, but is there something easy that i am just missing when looking at it from the inside?

Site Admin
Site Admin

Posts: 4938

Joined: Thu Nov 29, 2012 9:10 am

Location: Nampa, Idaho

Post Wed Jan 28, 2015 10:43 am

Re: Brad's 1954 R Series Build

There is a screw holding the lock rod on the end and then a clip that holds it in place, it should slide to one side, They would not be hard to get a key made I think. That is how I remember it. Yes, in those days there was only the one lock on the doors, you were supposed to exit from the passenger side. You should be able to lock your drivers door by pushing the handle in the opposite direction in which you do to open the door. I think that one of the members was talking about reworking the latch part to make the drivers door able to except a lock also. Do not remember who. If you were to go without locks on the door, may I suggest a "kill" switch in an out of the way place so that an opportunistic thief will not be able to just jump in and go.
My thoughts only and others may have better information.

Golden Jubilee
Golden Jubilee

Posts: 8948

Joined: Thu Dec 27, 2012 12:45 pm

Location: Canada's left Coast

Post Wed Jan 28, 2015 12:58 pm

Re: Brad's 1954 R Series Build

The lock can be rekeyed to match the ignition key. If you are talking about the latch assembly, this is a big and complicated deal . If you need to know, I will post a how to.
I was the nut-case who mentioned a locking upgrade for the left door.
I hope that Brad is wearing breathing protection. If he is not, he will get emphysema and it will kill him. Old paint contains lead and the grinder dust gets into your system. It takes very little lead to change one's life. No more erections, until you drop dead. With emphysema Brad will not be able to get enough oxygen for sex anyway. Strenuous exercise will stop your heart.
How do I know, my Dad was a victim of this preventable situation.
Last edited by nikkinutshop on Wed Jan 28, 2015 1:17 pm, edited 1 time in total.
I would rather have tools I do not need than to need tools I do not have
Artificial intelligence is no match for real stupidity....
User avatar

Golden Jubilee
Golden Jubilee

Posts: 343

Joined: Tue Jul 15, 2014 11:57 pm

Location: Plano, TX

Post Wed Jan 28, 2015 1:07 pm

Re: Brad's 1954 R Series Build

I assumed I would be removing the door handles when I go to work on the doors. You just got me nervous. ...lol

Golden Jubilee
Golden Jubilee

Posts: 8948

Joined: Thu Dec 27, 2012 12:45 pm

Location: Canada's left Coast

Post Wed Jan 28, 2015 3:14 pm

Re: Brad's 1954 R Series Build

This is the piece that I was referring to as the latch. The IH parts book suggests it is a lock assembly. The parts that you see in the exploded view show how much must be removed before the latch (lock assembly) can be removed from the door. Last out and first back in. Number 7, the channel assembly blocks the latch
My wife just reminded me that one of our neighbours died of complications from emphysema. He was a body and paint guy for a local new car dealer. He and I were the same age and he has been dead for 10 years. He was 59. From diagnosis until his death, Dad lived a miserable 6 years. Dad was 71.
Attachments
door parts view.jpg
the parts
part numbers.jpg
the part numbers
three different passenger latches.jpg
Three different manufacturers
Last edited by nikkinutshop on Wed Jan 28, 2015 3:22 pm, edited 1 time in total.
I would rather have tools I do not need than to need tools I do not have
Artificial intelligence is no match for real stupidity....
User avatar

Golden Jubilee
Golden Jubilee

Posts: 343

Joined: Tue Jul 15, 2014 11:57 pm

Location: Plano, TX
Post Wed Jan 28, 2015 3:22 pm

Re: Brad's 1954 R Series Build

Man, I am sorry to hear about your pops and your friend. I am most definitely wearing breathing protection as I strip away.

Thanks much for the diagrams!

Golden Jubilee
Golden Jubilee

Posts: 8948

Joined: Thu Dec 27, 2012 12:45 pm

Location: Canada's left Coast

Post Wed Jan 28, 2015 3:33 pm

Re: Brad's 1954 R Series Build

Some of the best advice is about looking after each other. I am just old enough to be in that group of working guys who did not wear protection of any kind. The list of work mates and friends that I have lost is long and for many of these guys, their situations were totally preventable. One of the guys lost an eye when the wire wheel spit out a wire which entered his eye. We called him "Patch". Many of my uncles were farmers and the grain dust has claimed many of them decades ago. None of them lived much past 60.
I have to go for regular checkups for lung damage because of the asbestos insulation that was loose and sometimes air-born, where I worked. In the 1970s some of the vehicles "the company" owned and ran had asbestos sheet insulation and it was always lose, falling out and making dust.
There is a new awareness in the trades about breathing and personal protection. I am pleased for the younger guys. It is hope for the best for the rest of us O.F.
My friend Ken died from emphysema complications, but he kept his sense of humour. until the end. He suggested that his friends were like crows sitting on a fence waiting for him to die so they could fight over his "Ol' Lady."
I would rather have tools I do not need than to need tools I do not have
Artificial intelligence is no match for real stupidity....
User avatar

Golden Jubilee
Golden Jubilee

Posts: 343

Joined: Tue Jul 15, 2014 11:57 pm

Location: Plano, TX

Post Sun Feb 01, 2015 4:20 pm

Re: Brad's 1954 R Series Build

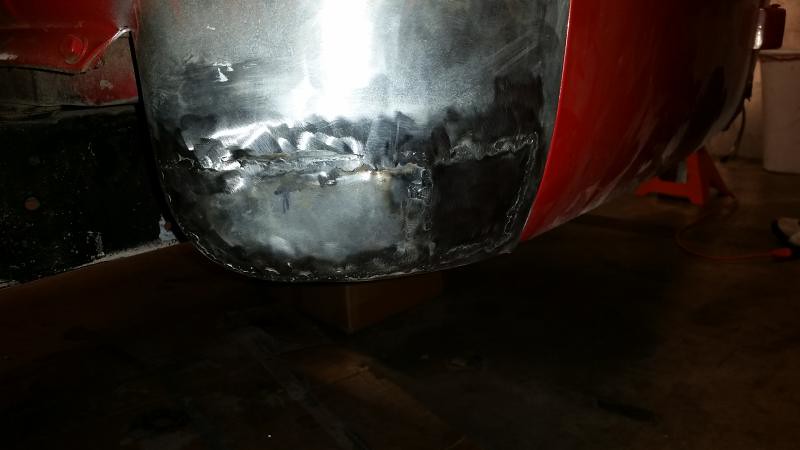
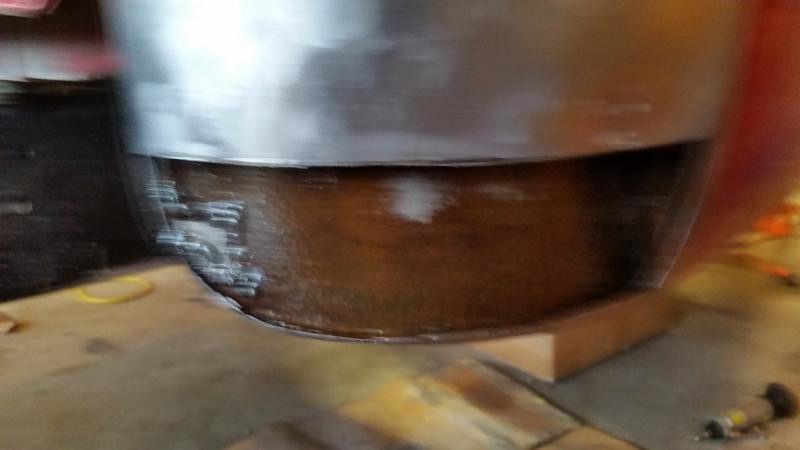
Got to work on the passenger cab corner yesterday afternoon. Got the bad stuff cut out.

sorry for the crappy pic, i didnt realize it was blurry until i closed it up

Image54 IHC by isu_phi, on Flickr

all buttoned up

Image54 IHC by isu_phi, on Flickr

Then, i started plugging holes in the firewall....until my welder crapped out. It was a crappy Harbor Freight welder anyways....and to fix it just isnt worth it to me. I have had a multitude of problems with it since it was new....i am not sad to see if finally die. So, i am on the hunt for a new MIG welder. I am thinking the Hobart Handler 140, but i have heard good things about the Lincoln welders too. I don't really want to burn $500 on more tools, but i have learned that the welder isn't really the place to cheap out if you are actually going to use it. I have a nice Hobart stick welder for the bigger jobs, does anyone have a recommendation on a good running MIG? any MIG i buy, running on 110V is going to be sufficient for me.

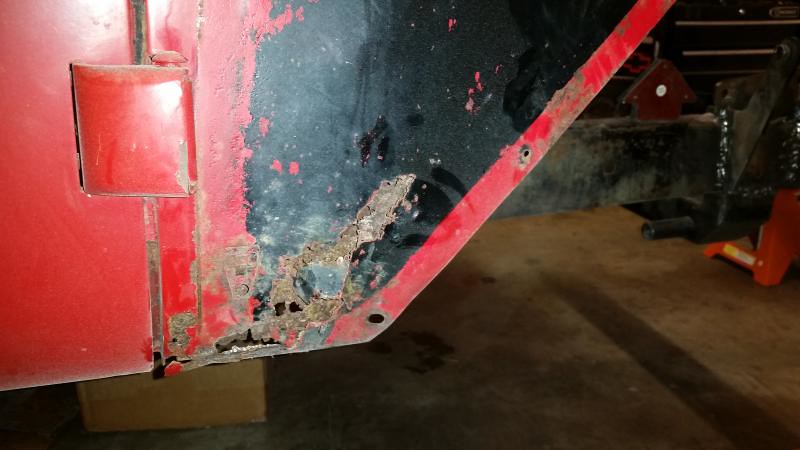
So, once i get my new rig, i will tackle the final corner of the truck. And, i think its safe to say this one is probably the worst out of the 4 corners

Image54 IHC by isu_phi, on Flickr
Last edited by bsievers1616 on Wed Aug 16, 2017 1:35 pm, edited 1 time in total.
PreviousNext

Return to L, R and S Build-Off

Who is online

Users browsing this forum: No registered users and 6 guests

cron
Powered by phpBB® Forum Software © phpBB Group
Designed by ST Software for PTF.