Page 6 of 35
Re: Brad's 1954 R Series Build

Posted:
Thu Mar 05, 2015 10:02 pmby lbesq
Fellow over in Sweden put in Chev headlights and blinker below from a 50's truck I think. I do not think he made it through the crashes and has not found the forum yet. The lights looked good.
Re: Brad's 1954 R Series Build
Posted:
Fri Mar 06, 2015 10:08 amby terryl51
bsievers1616 wrote:Question: The clip, circled in the picture, what is that for? When i took the fenders off, I don't recall anything actually bolted in there. Maybe it should have been, but i know it wasn't. Do i need to build that into my new piece that i am going to make? I can i just delete that?
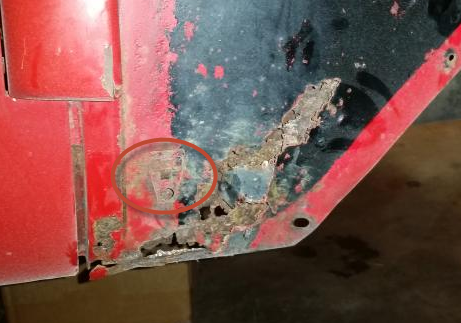
Looks like I am a little late with this post as it appears you have already eliminated the blind clip nut. But anyway I did not see where anyone told you what is was for.
It is the lower front fender attachment point. I am sure you will have to come up with some sort of replacement attachment to get the fender to attach at the bottom and hold the fender welt material. That having been said, you are doing a great job so far. I love seeing the family trucks restored. Stock or otherwise they are still saved and treasured.
Re: Brad's 1954 R Series Build
Posted:
Fri Mar 06, 2015 10:38 amby bsievers1616
thank you! Yes, i figured for what it was going to take for me to fab that back into my new piece, i could more easily figure out another way to attach the lower part of the fender.
Re: Brad's 1954 R Series Build
Posted:
Mon Mar 09, 2015 2:46 pmby bsievers1616
I really wish i would have taken a better picture of the grill when i first stripped it. One the top of the nose lived a good bit of filler, that when stripped away revealed some pretty nasty dents. I was surprised by that, because it looked pretty straight before taking all the filler out.
Spent some time with a hammer and dolly trying to get it as straight as i could. There isn't much room to swing a hammer in there. To my surprise, it didn't turn out too bad. Now, i think with much less filler, i will be able to make it look good again
Re: Brad's 1954 R Series Build
Posted:
Sun Mar 15, 2015 8:13 pmby bsievers1616
after what seemed like forever prep time.....i shot a little epoxy on one of the inner fenders. I dont have my dry air setup yet. I tried out the Eastwood Areospray Epoxy primer.
If nothing else, i might be quickly learning that i most likely will not do the base coat myself when that time comes

 54 IHC
 by
isu_phi, on Flickr
Re: Brad's 1954 R Series Build
Posted:
Mon Mar 23, 2015 10:53 amby bsievers1616
Started stripping the rest of the outside of the cab. I knew there was a dent on the driver side. Here she is
 54 IHC
 by
isu_phi, on Flickr
 54 IHC
 by
isu_phi, on Flickr
Re: Brad's 1954 R Series Build
Posted:
Mon Mar 23, 2015 10:55 amby bsievers1616
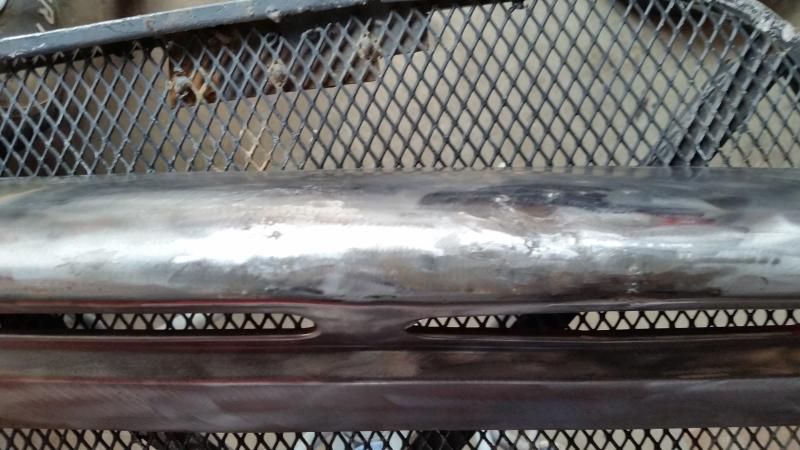
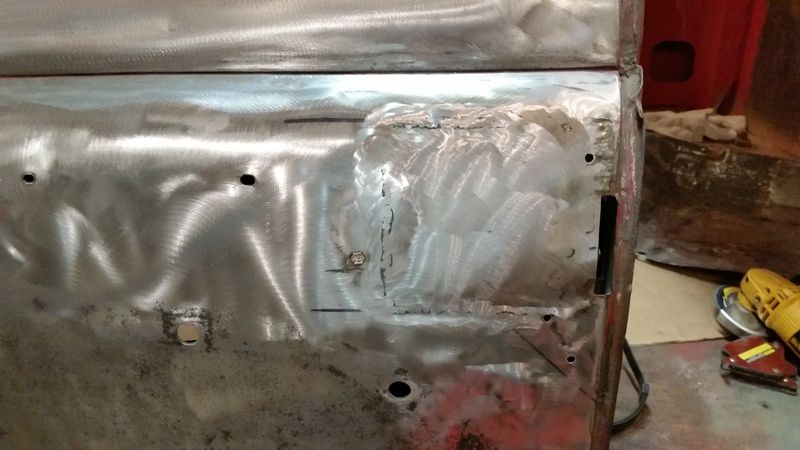
It was pretty banged up all the way to the edge. Which sucks. Rather than attempt to pull this dent out, i opted to cut out as little as i could, leaving as much on the edge as i could. After cutting the hole out, i was able to use to hand tools to get the metal as straight as i could. It didnt turn out so bad. Next job is to form up and put in a new piece. Sure, it will take plastic to make it smooth again, however, it wont take an inch think to do it this time.
Re: Brad's 1954 R Series Build
Posted:
Mon Mar 23, 2015 11:44 amby dirtcop
That was a lot of bondo! Anything you do will be an improvement over that. It really is amazing what you can find under old paint. Have fun. Dirtcop
Re: Brad's 1954 R Series Build
Posted:
Tue Mar 24, 2015 10:06 amby bsievers1616
This is hopefully going to work out OK
Re: Brad's 1954 R Series Build
Posted:
Thu Mar 26, 2015 3:42 pmby markedwin
Wow, that looked like the dent in mine , at least there was no bondo I just had to cut out the section and replace it as seen on my page but that is why it was all replaced.. smashed in badly.. Great job


