1310 build up


Rookie
Rookie

Posts: 11

Joined: Wed Mar 11, 2015 1:42 pm

Post Wed Apr 15, 2015 12:35 am

Re: 1310 build up

After a much anticipated wait (Im sure) I have returned, and I bring Pictures!!!

At the moment the Binder(as it is referred to by my family) is at the local shop gettin exhaust. true dual, crossover pipe, good mufflers, twin tips under the rear bumper, should look good and be quiet.

ANYWAYS... back to 4 years ago!

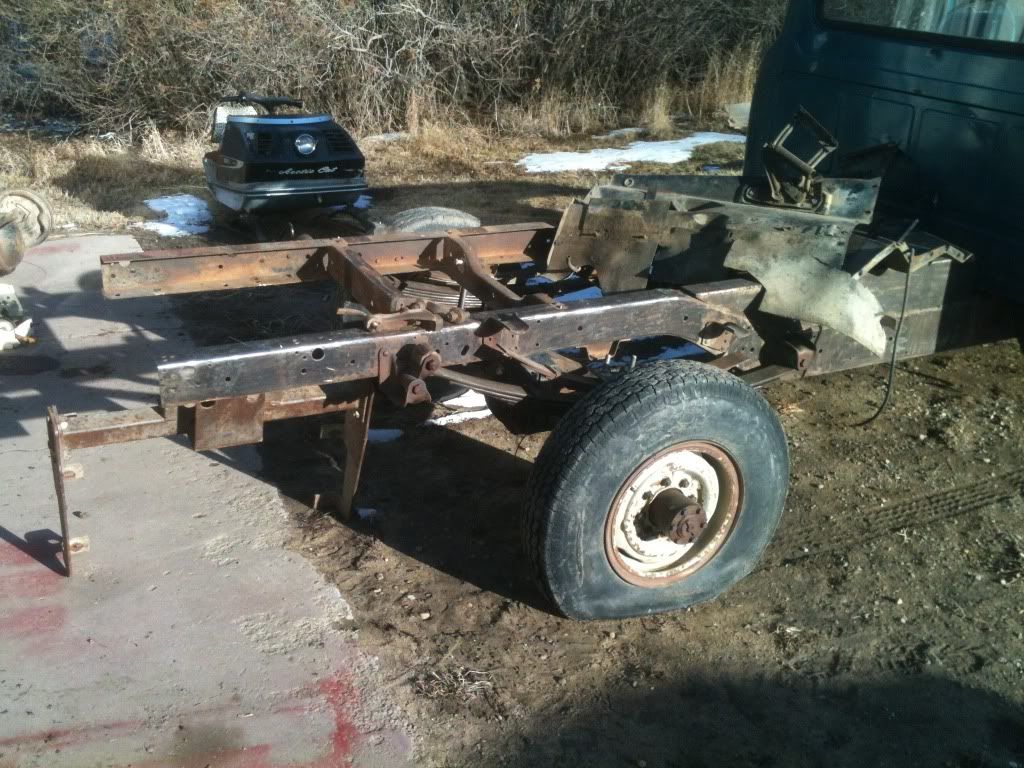
After installing the "NEW" rear axel, I pushed the truck outside and began the fabrication of the flatdeck. My fabrication skills were TERRIBLE back then and I did some terrible work. But boy did I learn! I then spent a couple years working with journeyman welders, that brought my fab skills up to a more acceptable level!

Image

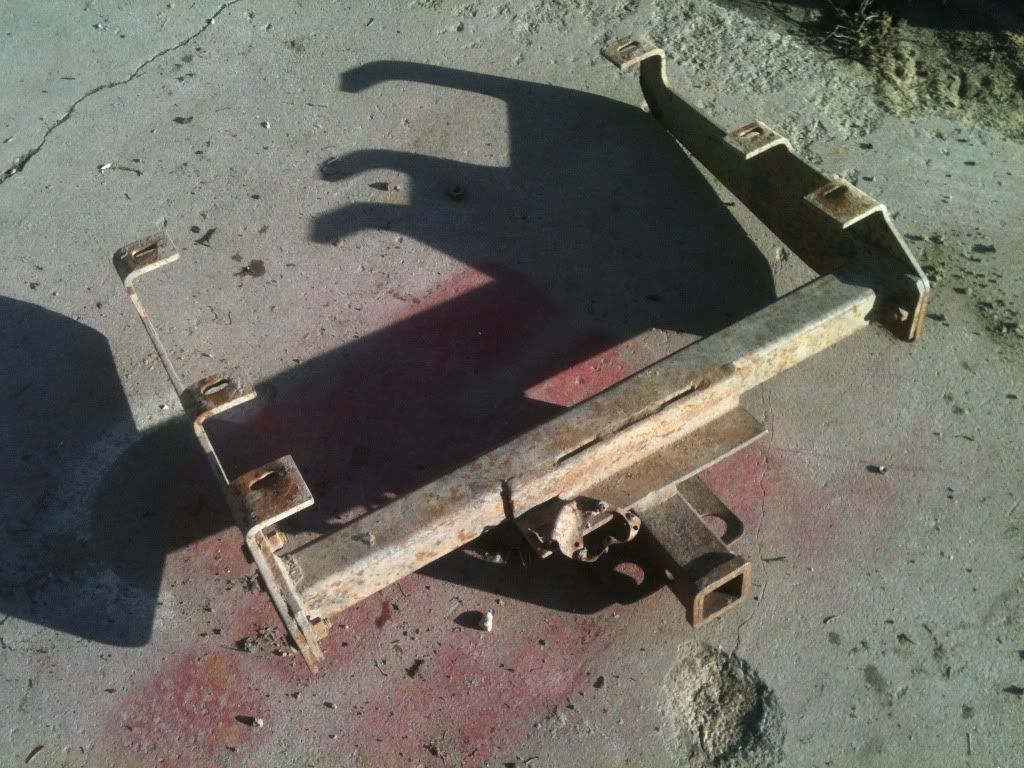
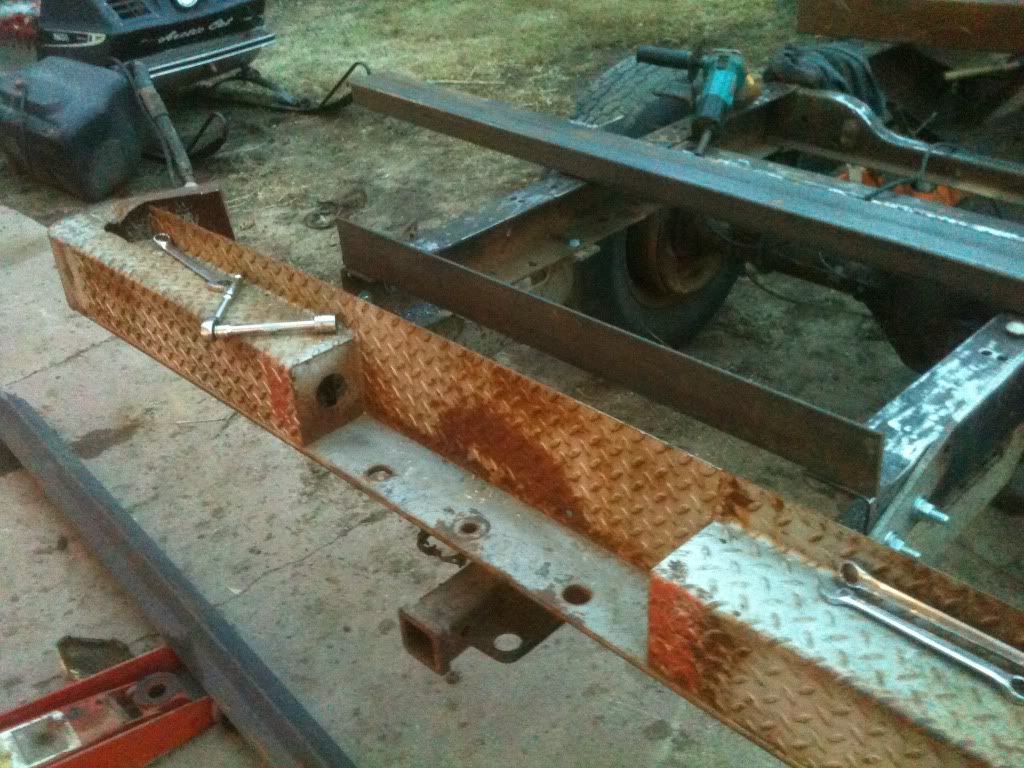
Class 4 receiver out of a chevy, free. and it bolted right up!!

Image

$400 of steel. much unsquare cutting and even unsquarer (that is totally a word!) welding soon took place. :t0174: :t3724:

Image

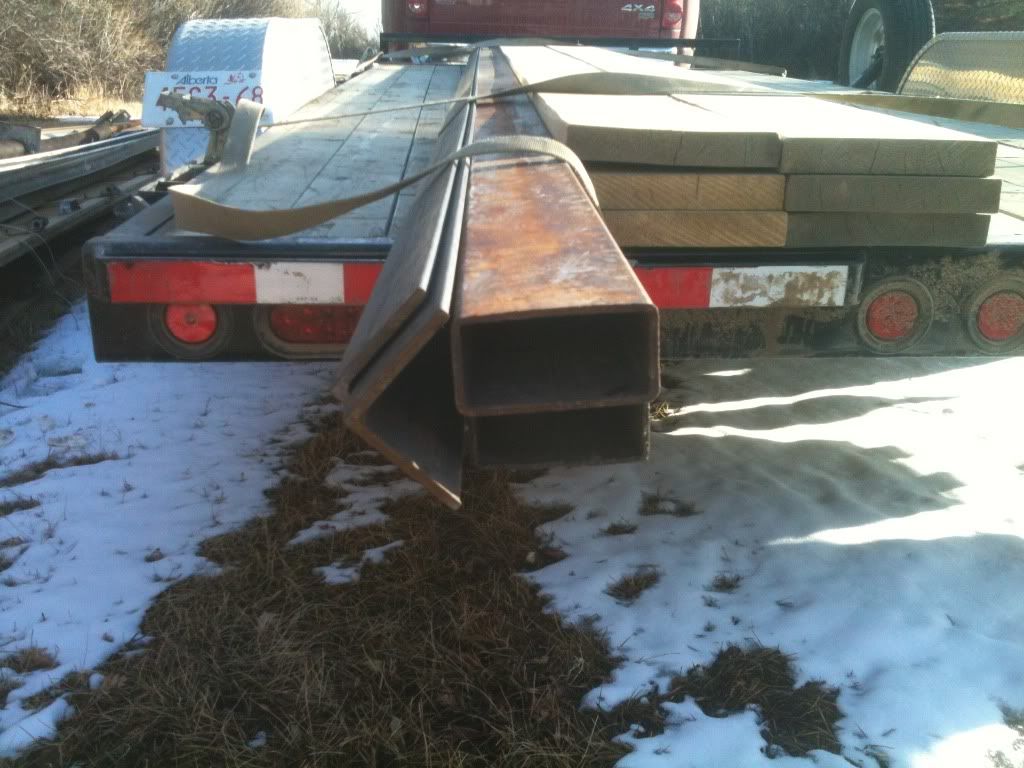
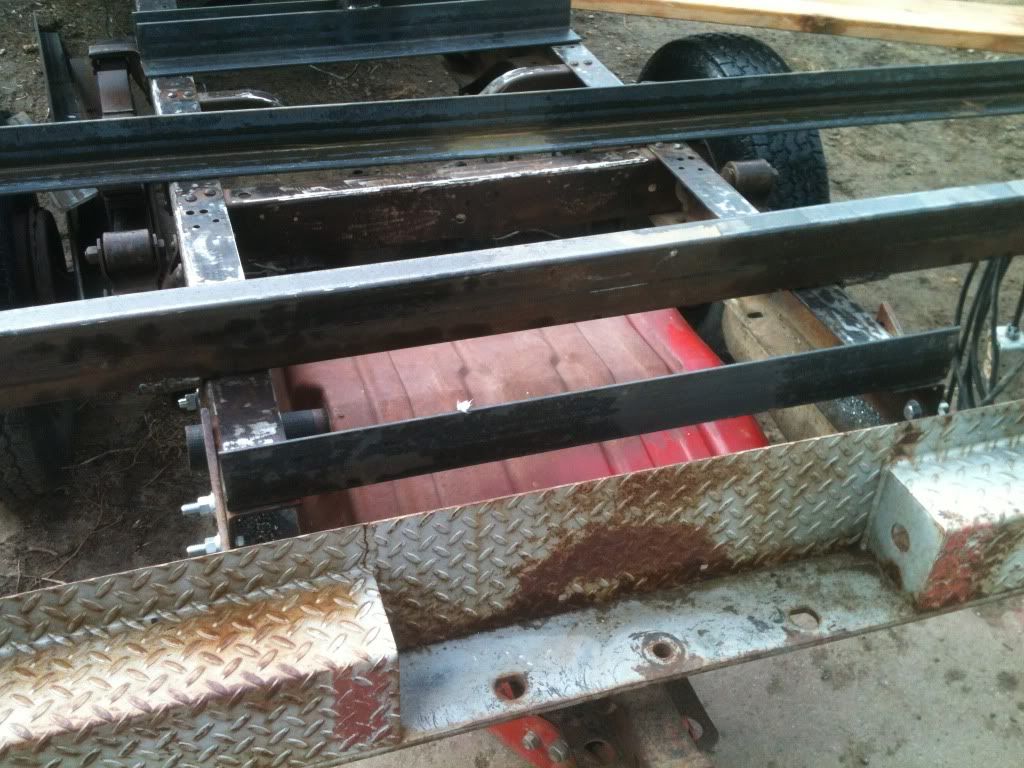
The basic design for the deck was simple. 4 crossmembers of 2x4x.125 tube steel composed the frame. they were secured to the frame front and back by angle irons, welded to the deck, bolted to the truck, for easy removal if necessary. Then 3x3x.375 angle iron was welded on 2" spacers on top of each edge of the tubes. once a wooden deck was installed, it would tuck under the inside of the angle iron, and the bottom outside edge would be in the perfect spot for ratchet straps to secure my cargo of tractors or whatever. the deck was designed to carry exactly 3 cub cadet garden tractors. I have 16 of them. anyways, off the ADHD bunny trail and back on topic

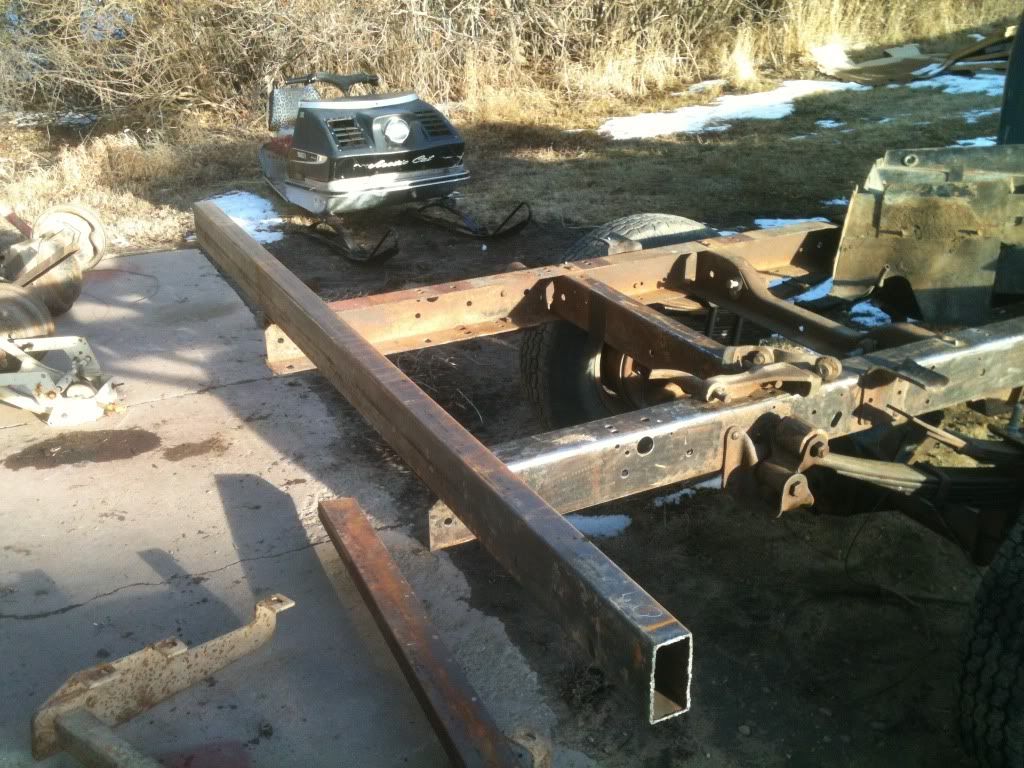
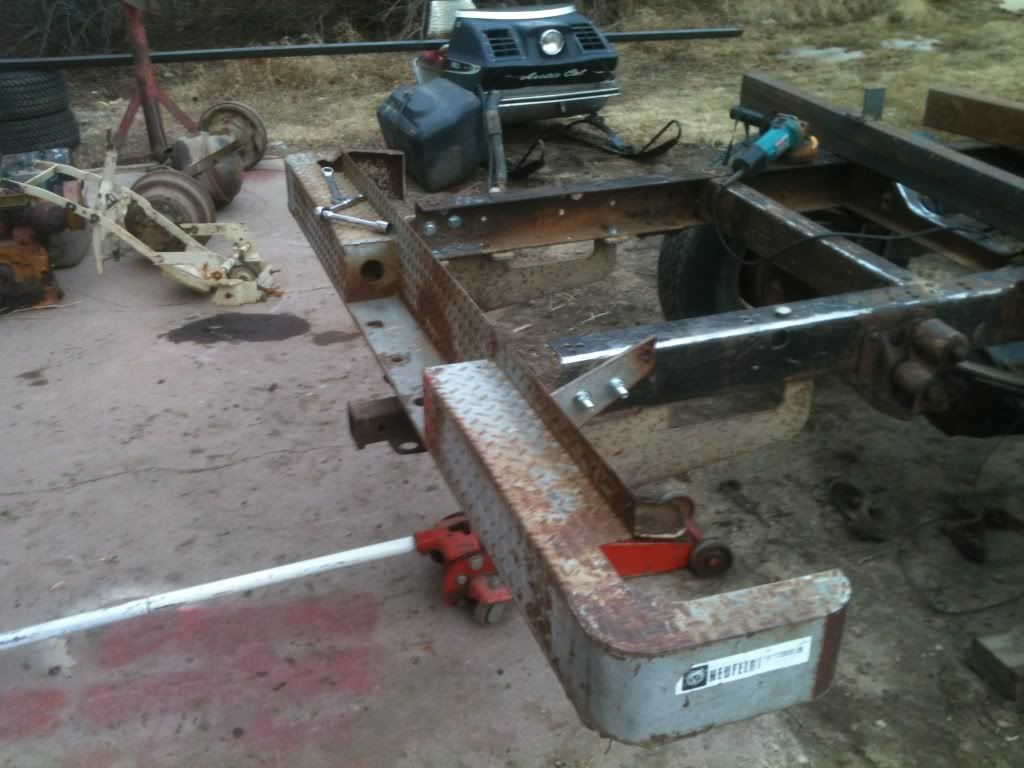
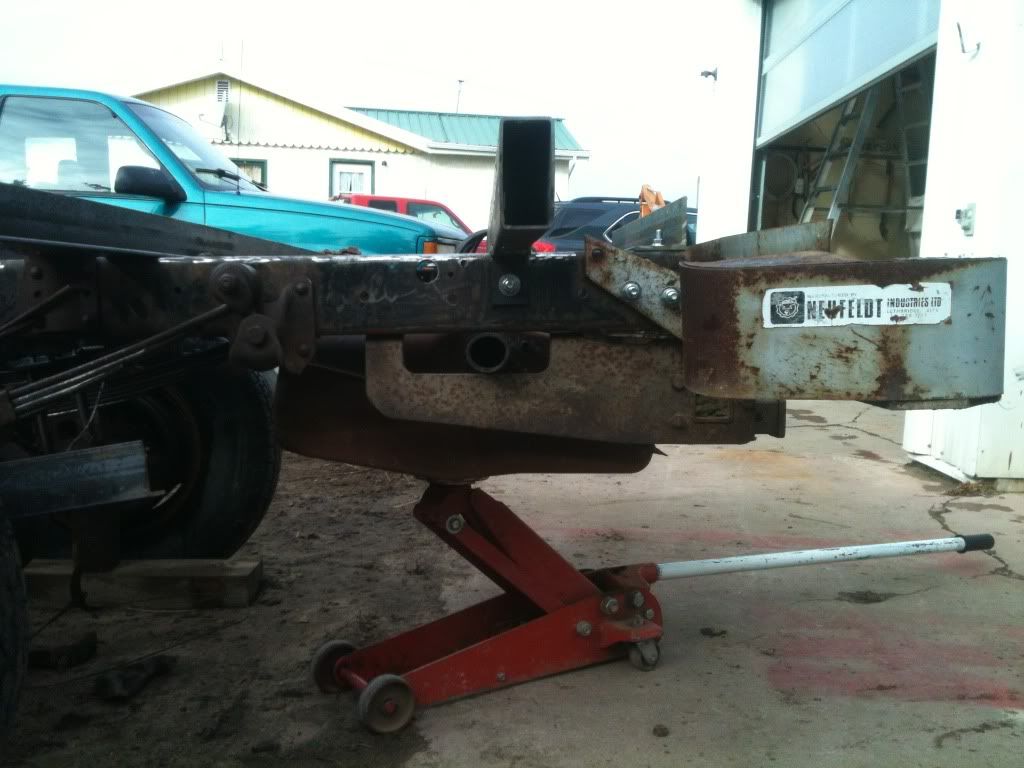
the rear crossmember.

Image

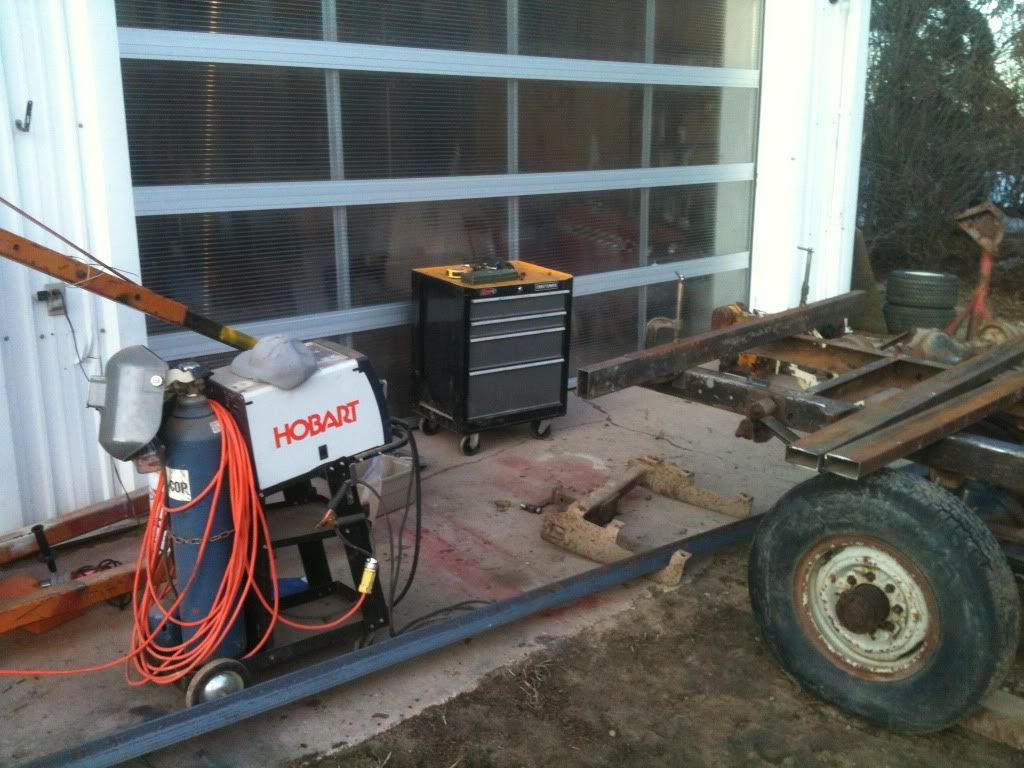
My work area and some of the tools.. you can just sense the high quality work about to take place!

Image

Freebie chevy bumper. also bolted right up. imagine that!

Image

Image

And the freebie scout tank mocked in place.

Image

Image

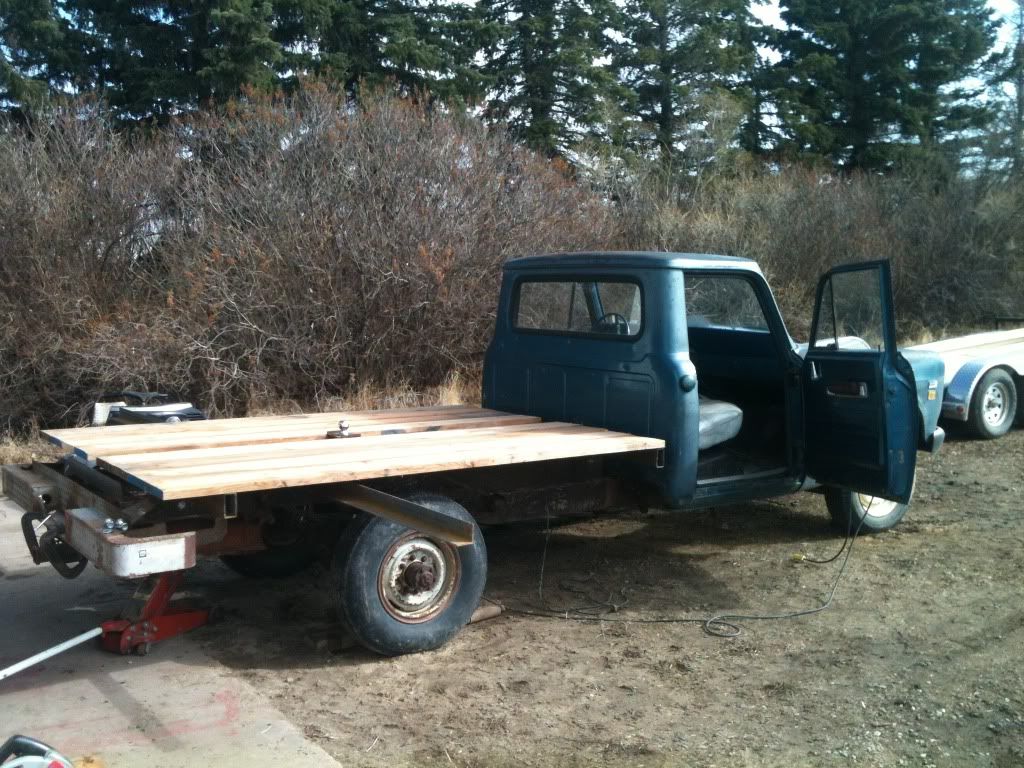
Door is open because... the stereo was the first thing completed! imagine that!

free decking has been cut and just laying in place to see how it looks.

Image

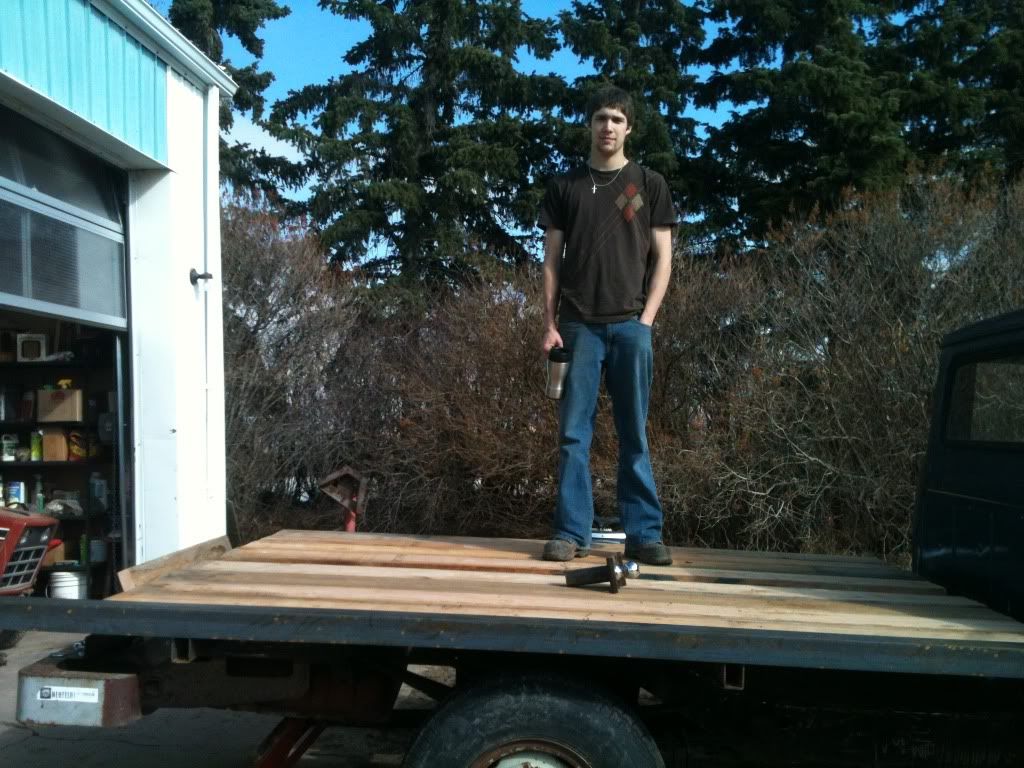
This picture shows the way the angle iron sits on the edge of the deck. That is 16 year old me.

Image

I wasnt done with the deck yet, but I was waiting for dad for the next step, so I pushed it back inside. Next up, BRAKES!!

Rookie
Rookie

Posts: 11

Joined: Wed Mar 11, 2015 1:42 pm

Post Wed Apr 15, 2015 12:46 am

Re: 1310 build up

Time for stopping!

As mentioned earlier,I dropped a few hundred bones on a bunch of new parts, and I am so glad I did. I love to tell my passengers "brake check, hang on" then lock up all 4 wheels at 70 miles and hour. It scares them!

I originally ordered 4 sets of 3x12" shoes, but when i switched axels I found that the D60 only had 2.5x12" so I ordered a set of those. I kept the extra 3" set for spares.

Fronts
Image

Image

Image

Old and new. not the same but very close. same bore anyways
Image

I had never seen a drum brake set before, so I turned to the countless $2 "DIY car repair" books my dad had purchased for me when I showed an interest in mechanics. between the 5 or 6 books I was able to do the brake job myself. took 2 or 3 times but I got it all put back together the right way!
Image\

Image

We interrupt this program for an important announcment! $1600 of engine goodness!!

Look for a re-occurring trend, look at the color of the walls in my room and wait for what I do to the truck...

Image

Image

UPS dropped this.... bent it and broke teeth of the DISSY drive gear. the package sat unopened in my room for 2 months.. they wouldnt pay up. turds

Image

Back to brakes!!

rears!

Image

Image

Image

All four sets of shoes.

Top left is back left, top right is front left.
front left cylinder was stuck
front right cylinder was leaking
back left axel seal was beyond leaking and had lubed everything up
back right axel seal was good... shoe was down to steel and drum was scored.

Image

Image

now on to engine disasembly.

My uncle, who did some truck pulling back in the day and can rebuild an SBC in his sleep, helped me out with this. I was running a small engine business at the time but I had no experience with the internals of an 8 cylinder.

Image

Image

These are 1 and 3, it ingested something and these two got it.

Image

Image


got the front drums turned, no one would touch the backs, and I couldnt find new ones... so I cleaned em up and put em back on!! i would never do that with fronts i swear!

Rookie
Rookie

Posts: 11

Joined: Wed Mar 11, 2015 1:42 pm

Post Wed Apr 15, 2015 1:18 am

Re: 1310 build up

Back to the deck now!

Pushed the truck to the other side of the farm yard to where the arc welder was. Doesnt it look terrible with that tire arrangment?

Image

Thats my "little" brother sittin on the back.

Image

I am so embarrassed by my welding at the time that I shall not show close ups..

but here is the deck, tacked and ready for some MIGing. it is upside down to how it would be on the truck. I added the 2" spacers under the crossmembers because... I needed room for suspension movement. The tires had to have some room to move upwards. Hindsight being 20/20 I should have made it a 4" spacer. oh well

Image

Image

Dont cast judgement on the weld... this shows the spacer under the angle iron. and the tabs I added inside the angle so that ratchet straps wouldnt slide.

Image

Aint it purdy?

Image

wood is stained, 3 coats.

Image

School shop project, MDG 5 1/4" speaker mount, goes on the trans tunnel. I did a good job on this, much better than the sub boxes my peers slapped together.

Image

The speakers are at EXACTLY 90 degrees, so there will be no summing or cancelling of certain frequencies. Imaging with this setup isnt great, but It was better than what I had before!

Image

Image

Back to the deck, here it is all welded up and bolted to the truck, without decking of course.

Image

Image

Image

Front clip is off, for some painting and cleaning up of the frame.

Image

Image

Rookie
Rookie

Posts: 11

Joined: Wed Mar 11, 2015 1:42 pm

Post Tue Oct 13, 2015 12:16 pm

Re: 1310 build up

I'm Back!

More new parts time.

Inner fenders, New front bumper. nothing is actually new, just better
Image
Image
Paid $100 for the bumper, it has been straightened and rechromed. Paid $150 for the fenders. they arent perfect but they will support the hood hinges at least

Changed the carrier bearing. Magically we had one sitting on the shelf for a chevy 3/4, it fit!
Image
Image
Image
Image
Image

Put some of the dash together
Image

Did some more tremclad work

Image
Image

Built the underdeck boxes and hung them

Image
Image
Image

Rookie
Rookie

Posts: 11

Joined: Wed Mar 11, 2015 1:42 pm

Post Tue Oct 13, 2015 12:26 pm

Re: 1310 build up

More stuff, the BW trans
Image

New U-J's
Image
Image

Engine assembly time
Specs, 345, punched out .040, became a 354. Mains turned .010, rods didnt need to be changed. new flat top pistons, moly rings, new exhaust valves, 7 angle valve job, new lifters, still on the factory cam (UPS dropped my ISKI) deck and heads were machined smooth, hot tanked, etc.

Image
Image
Image
Image
Image
Image
Image
Image

Dam those heads are HEAVY!
Image

All done for the day

Image

Image

Put the valley pan in, it had a 1/4" gap in places, RTV to the rescue...

Image

Flipped it to torque the mains again and to tighten the rod bolts, new oil pump, pan etc

Image
Image
Image
Image

Guy who loaned me the engine stand said it held up a 454 no problem. I couldnt put the balancer on without fearing it was going to break the stand!
Image
Image
Image

I didnt know too much about how the SV engines are very picky about their valvetrain, and I skipped a lot of steps that I will probably have to redo sometime. My uncle who helped me assemble it, was a SBC/BBC guy, and he didnt know much about them either. I have a feeling that I will be doing some porting work in the future, and a new cam, lifters and such will be done then. I will also clean out the rocker shaft, all the passages, trim the plate on the back of the cam, and maybe enlarge the oil holes in the cam bearings if it requires it.

Rookie
Rookie

Posts: 11

Joined: Wed Mar 11, 2015 1:42 pm

Post Tue Oct 13, 2015 12:41 pm

Re: 1310 build up

Time for paint
Image

Image

Image

Image

Image

Image

Image

Image

Image

Image

Image

And a test fit. I was thrashing furiously at this point, all of the engine assembly, paint, and the test fit was 2 days. I was trying to get the truck mobile for my graduation.

Image

got my new rims and better tires mounted up. I LOVE the 33's on the back

Image

Image

Image

FIRST RUN!

The timing was miles off, carb was bad, and something was seriously wrong in the engine.

Image

Image

Rookie
Rookie

Posts: 11

Joined: Wed Mar 11, 2015 1:42 pm

Post Tue Oct 13, 2015 1:02 pm

Re: 1310 build up

I was only working on the truck after school, so I could only get in 4 hours per day or so. I still had a lot left to do and grad was fast approaching. I couldnt get oil pressure, cold was less than 20, and it would drop off to nothing as it warmed up. There were no unusual noises, and it took me over a month to finally figure out what was wrong. Most of the assembly of front fenders, motor mounts, rad, all that stuff is pretty basic, so I didnt take any pictures. When I first got the sheetmetal and the rad it, I filled it with water and went home. The next day (saturday) I found all of the water dumped on the floor. Every single frost plug leaked. Every single one. I was very cheesed, but managed to pull the engine myself in less than 3 hours. I got the engine and trans split, popped all the new plugs out, got new ones, and sprayed hi tack gasket maker on them. I let it set, then pounded them in. I filled the engine up while it was sitting on the floor, and had coffee. Everything was dry when I came back, so I shoved the whole thing back in the truck again. Man is that combination ever heavy!

Anyways, more pictures! For my birthday I was given a bunch of IH mudflaps and floormats
Image

Image

Image

Grad had come and gone, and terminal low oil pressure prevented me from using the truck. I actually didnt even go to grad, I took my Cub cadets and headed up to camp, to do the spring cleaning instead. I think that was a much better idea!

In my hunt for the low oil problem, I had taken the timing cover off to rule out a missing welch plug, cut the oil filter open to look for plugging, removed and tested the oil pump, as well as tried several gauges. In the end, it was all a miscommunication. The machine shop neglected to tell me that the crank had been turned .010, and I had installed standard bearings!!! So... knocked the pan off and turned in some .010's! how about 50 PSI cold and 15 Hot? much better!!

Image

Then I did my first round of electrical, for the stereo and such. dont judge... I was only 17!

Image

The day I took these pictures was the day before my grandpa died. He got to see the project nearly finished though, and we were both happy about that. He died less than 6 hours after I showed him the pictures.

Image

Image

Image

Image

After about 100 miles of short drives, I loaded it up, packed up, and headed to camp for a week, about 300 miles away. I never go to camp without a tractor, I grade the roads, till the beach, pull out stumps, and do anything else i can, because that is how I relax, and I like to play with tractors!

Image

Image

Image

The trip started off well, till about mile 50. Then I noticed a smudge on the windsheild. I wasnt running a hood, so I could keep an eye on my new engine. The smudge was transmission oil, coming from a crossthreaded cooler fitting on the rad. of all the parts I brought with me, that was not one of them. I travelled on a sunday, so nothing was open. I went through 5 liters of oil in the remainder of the trip. Boy did that make a mess!!

Then at about mile 180, The left exhaust donut called it quits. I didnt know to install a firepipe inside of the composite donuts, and so they eventually burned out. I had replaced the right hand one with a steel donut a week ago, and brought another for the left side. I still have the burns on my hand from that adventure. See, there was a huge storm coming, and I didnt want to be caught sitting stil with no hood on, so I thrashed to change the donut and get back on the road.

at mile 200, I ran into the worst rain I have ever see. There was an inch of water on the road, most everyone was pulled over. With no hood on, my poor engine was stumbling, and I thought if I stopped it would stall, so i pressed on. good thing that the heater and wipers worked well!

At mile 270 the rain let up, and I finished the trip in peace. I will never forget it though!

I fixed the trans cooler line during the week, and the ride home was completely uneventful.

Golden Jubilee
Golden Jubilee

Posts: 525

Joined: Mon Dec 17, 2012 10:50 am

Location: Fletcher, OK

Post Wed Oct 14, 2015 11:47 am

Re: 1310 build up

Sounds like you had quite the adventure, your old pick-up looks to be coming along very nicely though.
46 K3
52 L110
68 Cadillac Coupe DeVille

Freshly Restored
Freshly Restored

Posts: 227

Joined: Sun Mar 08, 2015 12:59 pm

Post Wed Oct 14, 2015 11:11 pm

Re: 1310 build up

Nice to see someone your age interested in "Corn Binders"! NICE TRUCK! I had a '65 1000,with a 304/4-speed. GREAT truck! I removed the original,beat-to-death box,and made a flatbed,too. You can haul more with a flatbed,and I built and installed the under-Deck boxes Very Similar to yours! Great for tie-down straps,tools,etc! Glad your Grandfather was able to see your pic's of the truck! My Condolences! Nice Truck! GREAT Job on everything,Especially the MOST important part-THE BRAKES!! Keep up the Good Work!!
User avatar

Golden Jubilee
Golden Jubilee

Posts: 1887

Joined: Thu Nov 29, 2012 10:40 am

Location: Wichita, Kansas

Post Thu Oct 15, 2015 8:42 pm

Re: 1310 build up

Thanks for sharing (again). You have lots of great pictures.

Dean
Lifelong Kansan
Grew up with red paint
Moved off the farm 33 years ago.
PreviousNext

Return to 1000 Series

Who is online

Users browsing this forum: No registered users and 5 guests

cron
Powered by phpBB® Forum Software © phpBB Group
Designed by ST Software for PTF.